
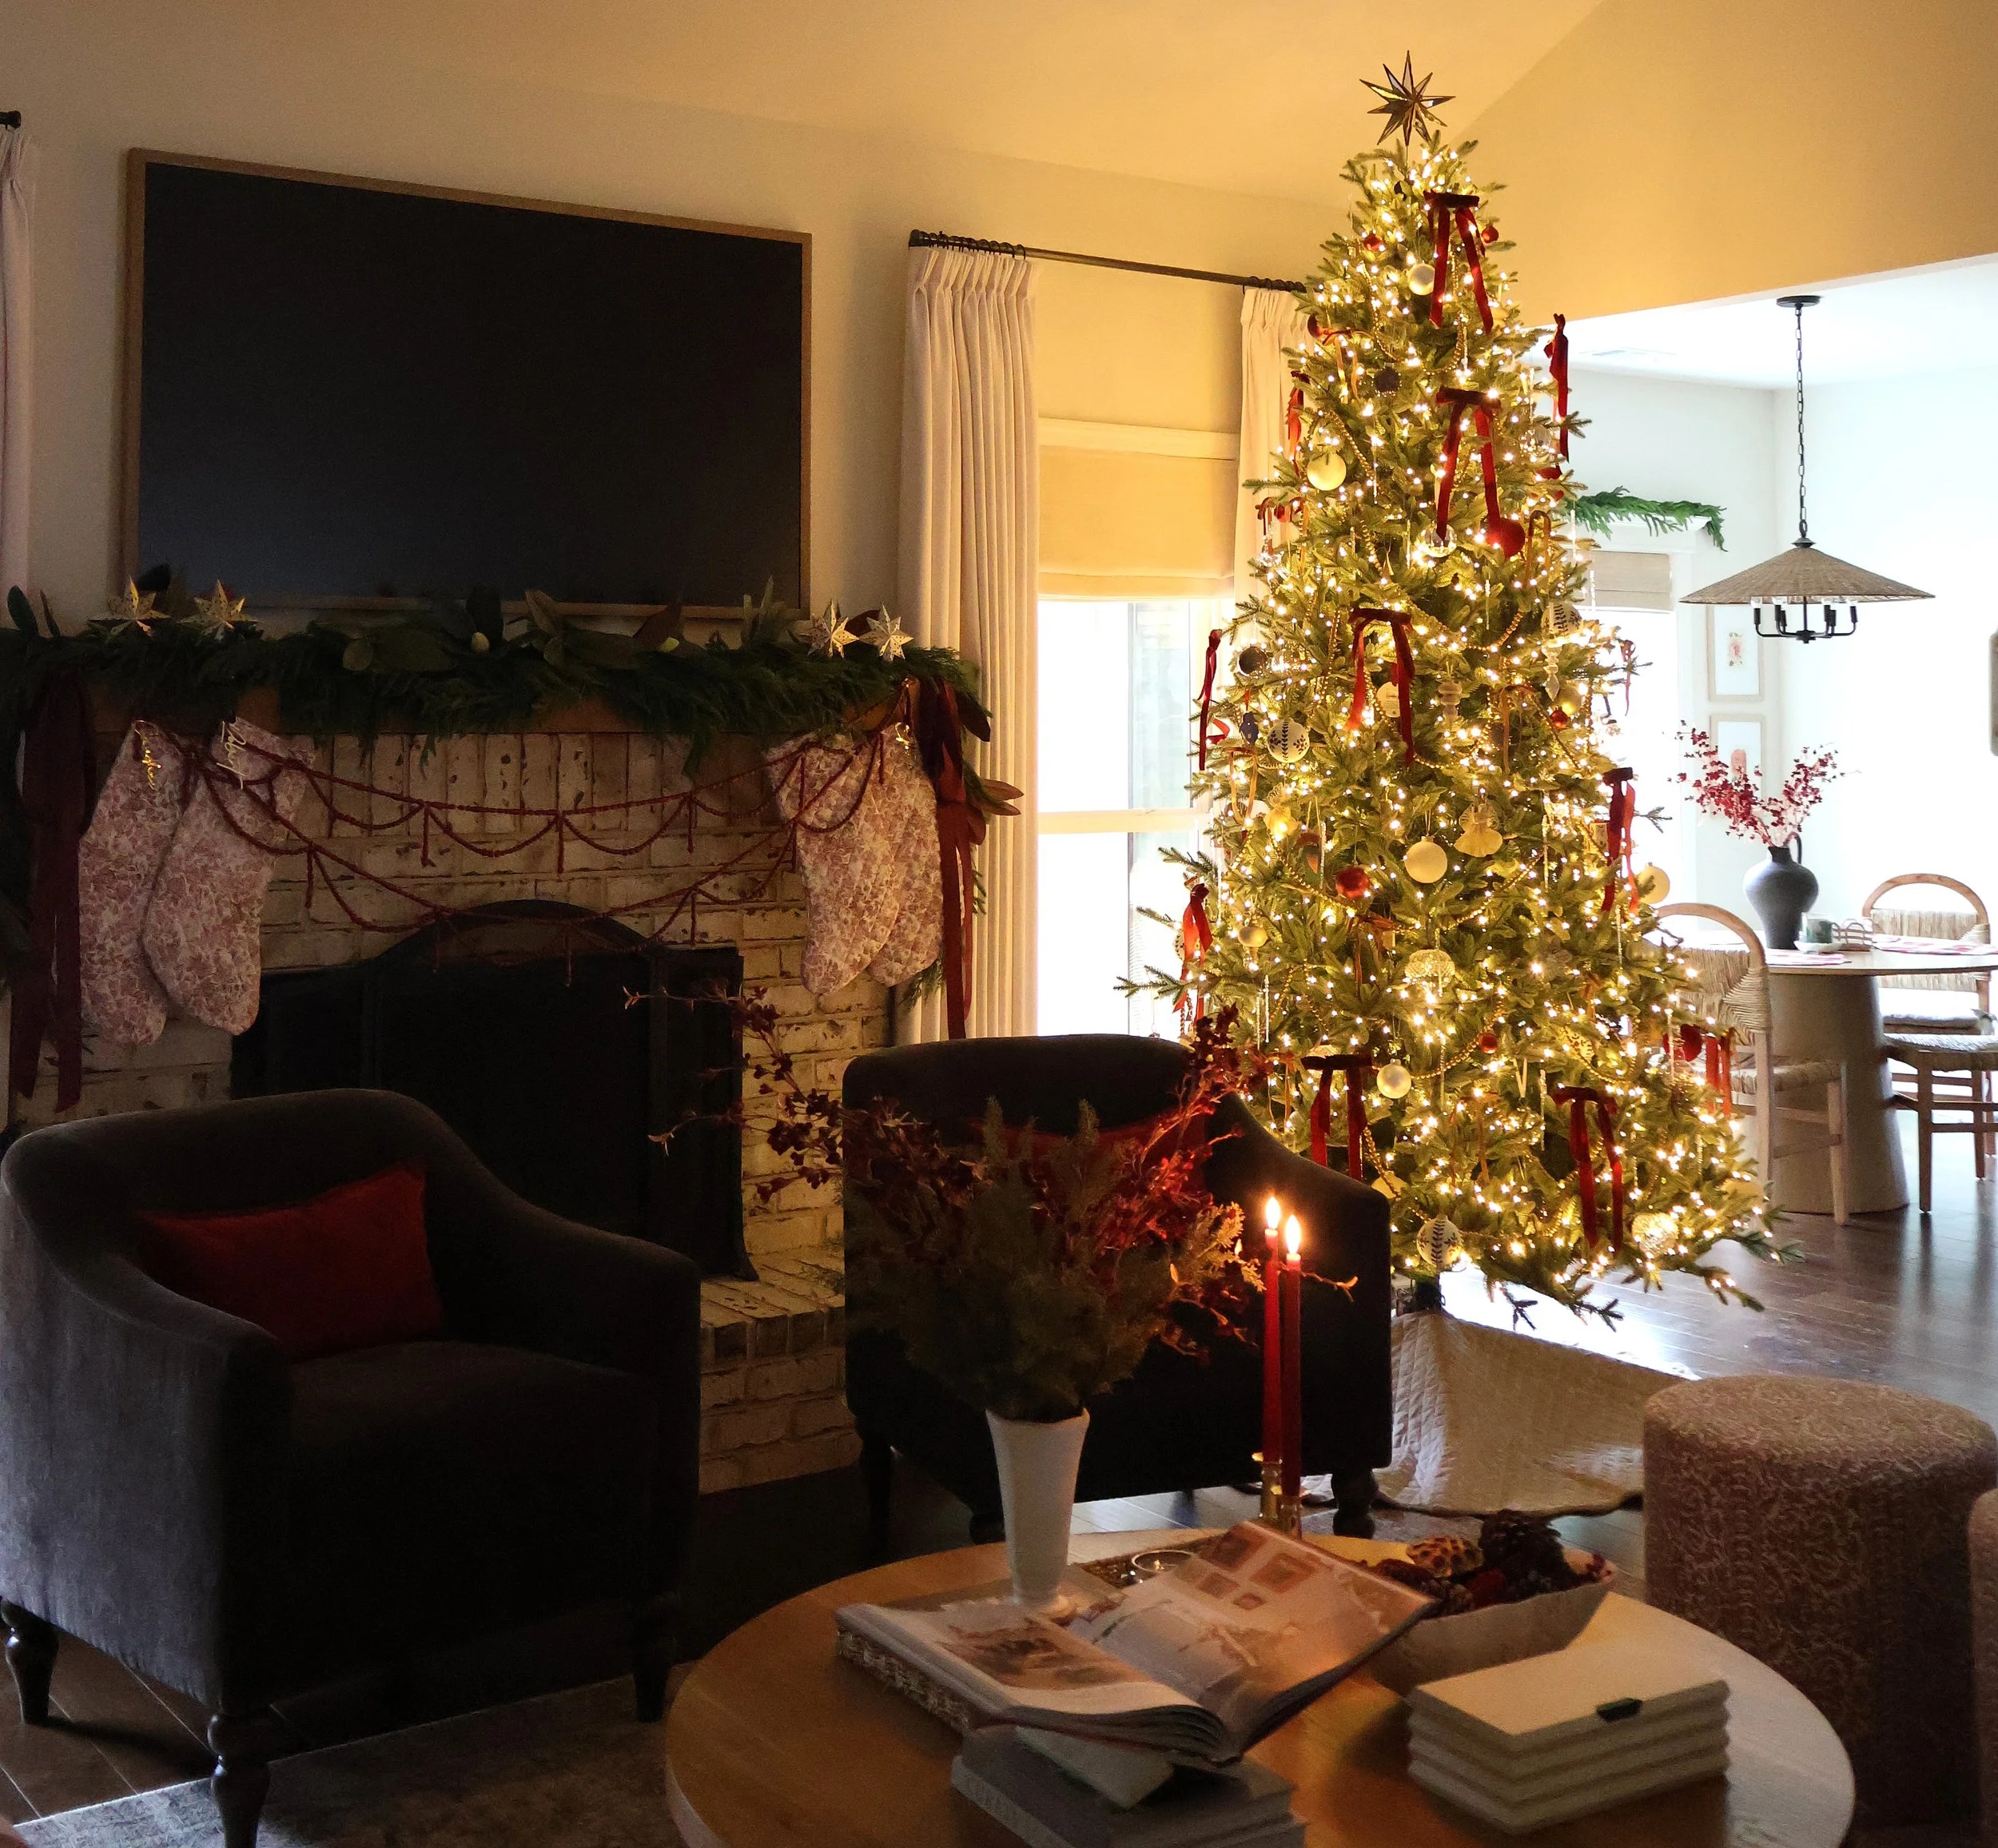
I used to think a great Christmas tree meant a great theme. New color story, new ornaments, new everything. Every single year.
And every year, the tree still looked a little off. Not bad. Just not like the picture.
Here's what I finally figured out: it was never the theme. It was the structure.
Every tree that looks styled, whether it's in a magazine or a friend's living room, is built from the same 7 pieces. Four of them you buy once. Three of them you swap when you want something new.
That's the whole formula. Let's build it.
The two-layer method
1. A realistic green tree
Classic beats trendy, every time. A realistic green tree works with any color story you throw at it, this year and ten years from now. Flocked and colored trees are fun, but you'll get tired of them long before the tree wears out.
Measure first. Take your ceiling height and subtract about 12-24 inches for the stand and topper. A tree that's too tall is the #1 money waster.
Small room? Go slim. A slim or pencil tree gives you the height without eating the whole room.
Fluff every single tip. Start at the bottom and work up, pulling each tip in a different direction. A fluffed $150 tree beats an un-fluffed $500 one.
SHOP MY PICKS

2. Lights (more than you think)
This is where most trees fall flat. The rule of thumb is about 100 lights per foot of tree. So a 7-foot tree wants around 700. Yes, really.
Weave in and out, not just around. Run the lights from the trunk out to the tips and back. That's what makes a tree glow from the inside instead of looking like a light-up cone.
Test every strand before it goes on. Five minutes now saves you an hour of undecorating.
Start at the bottom near the outlet so the plug ends up right where you need it.
Put it on a smart plug or timer. It's on when you walk in and off at bedtime, with zero effort.
SHOP MY PICKS
3. Filler ornaments in 2 neutral finishes
Filler ornaments aren't the stars. They're the backup singers, and they make the whole tree sound good.
Same color, two finishes. Think matte gold plus shiny gold. You get instant depth, and it never looks matchy.
Hang them deep inside the tree first. They fill the holes and bounce light back out.
Buy the big boxed sets. Filler is about quantity, not specialness.
Go shatterproof. More on that in the kids and pets section below.
SHOP MY PICKS
4. A tree collar, skirt, or planter
This is the piece people forget, and it's the difference between "finished" and "almost."
Measure the stand's base before you buy a collar. Too small is the most common return.
Hide the cords inside it. Run the extension cord through the collar and the mess disappears.
Real tree? Put a waterproof mat or tray under it. Your floors will thank you.
SHOP MY PICKS
The Accent: swap these whenever you want
1. Ribbon or garland
Change the ribbon and you've changed the whole tree. It's the cheapest yearly "new look" there is.
Wired ribbon only. It holds its shape and doesn't droop by mid-December.
Skip the wrap-around. Cut 18 to 24 inch pieces and tuck the loops into the branches, or cascade it from the top down.
Bows are having a moment. A few big ones on the tree feel current without committing to a whole theme. I love changing the color scheme by using bows.
Prefer garland strands? Same idea, different texture.
Swag, don't wrap. Let it dip a few inches between branch tips instead of pulling it tight like a belt.
Small dips at the top, bigger dips at the bottom. That keeps the proportions right as the tree widens.
Plan on roughly 6 to 9 feet of garland per foot of tree for a loose swag. Several shorter strands are easier to get even than one long one.
Pick one lead. If you use ribbon and garland together, pair a thin bead garland with a wide ribbon so they don't compete.
SHOP MY PICKS
2. Picks and stems
This is the secret to the designer look. Picks fill gaps, hide bald spots, and add texture the ornaments can't.
Cut long stems into 2 or 3 shorter picks with wire cutters. Double the look, same price.
Angle them outward so they look like they're growing from the branches, not stuck on.
Place them in a loose zigzag from top to bottom so your eye travels the whole tree.
Aim them at your bad side. Every tree has one.
SHOP MY PICKS
3. Statement and sentimental ornaments + topper
This is what makes the tree feel like yours. Everything before this was structure. This is the story.
Hang statement pieces at eye level, facing out. Don't bury your favorites in the back.
Add one new ornament every year. It's a tradition, and it's the only "new" thing you actually need to buy.
For the topper:
Size it up. Most toppers are too small. You should see it from across the room. On a 7 to 7.5 foot tree, think 10 to 14 inches.
It doesn't have to be a star. An oversized bow made from your tree ribbon matches automatically. A burst of leftover picks fanned out at the top looks custom and costs almost nothing.
Wobbly topper? Zip-tie a dowel or a stiff piece of cardboard tube to the top pole for a sturdy base. Heavier toppers get secured with floral wire to a strong branch.
Put it on right after the lights, before the ornaments, so you're not reaching over everything. And use a step ladder, not a chair.
SHOP MY PICKS
The order that saves you a headache
The order matters more than you'd think. Do it this way and you'll never knock half the ornaments off reaching for the top.
Fluff every branch, bottom to top.
Lights, woven trunk to tip.
Topper, while nothing's in your way.
Ribbon or garland.
Picks and stems, filling the gaps.
Filler ornaments, deep inside first.
Statement and sentimental ornaments, out front at eye level.
Collar or skirt last, with the cords tucked inside.
Making it work with kids and pets
We have kids and two dogs, so I'm going to be real with you: a beautiful tree that gets knocked over isn't beautiful. Here's how to make it pretty and practical.
Shatterproof only on the bottom third. That's tail-wag and toddler-grab height. Save the glass for up high.
Give the kids a zone. The lower front branches become their spot for handmade ornaments. They're proud of it, and your fragile pieces stay safe. Personally, we give our kids their own tree to decorate with their special ornaments.
Choose a collar or planter over a skirt. There's no fabric to drag, chew, or get tangled in.
Anchor the tree to a wall hook with clear fishing line if you've got a big dog or a climbing cat. Nobody will ever see it.
Keep beads up high. A broken bead garland is a pile of choking-size pieces. Wood or felt is safer down low.
Skip tinsel if you have cats. If they swallow it, it can cause a serious blockage.
Skip popcorn and cranberry garland if you have a dog. It's basically a snack strand at nose height.
Lightweight topper if anyone in your house might bump the tree.
Pack it up right (future you will thank you)
Next year's tree starts the day you take this one down.
Label bins by layer: Foundation, Ribbon and Garland, Picks, Sentimental. Next year you'll know exactly what you have.
Store ribbon rolled, not crushed, so it's ready to go.
Wrap each garland strand around a piece of cardboard or an empty paper towel tube. No more 20 minutes of untangling.
Give the topper its own padded box, and stuff bows with tissue so they keep their shape.
Next year's refresh: keep the Foundation and swap just the ribbon, a few picks, and add one new ornament set. That's a whole new look without starting over.
One sale rule: after-Christmas sales are for Foundation pieces only. Don't stock up on trendy accents you'll be over by next December.
Buy 4 once. Swap 3. Done.
That's it. You don't need a new theme. You need a tree with good bones and a few pieces you love.
Start with the Foundation, have fun with the Accents, and let the sentimental stuff tell your story. Your tree doesn't have to look like the magazine. It has to look like home.
Save this for tree day, and come say hi on Instagram @philomenaandco. I'd love to see what you build!